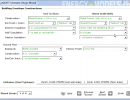
eQUEST Schematic Design Wizard
This lesson introduces the user to the eQUEST Schematic Design Wizard.
Lets open eQUEST and take a look at the schematic design wizard. You are immediately
presented with a box asking you to open a recent project, existing project, or create a new project via the wizard.
We elect to create a new project via the wizard, and then choose the schematic design wizard. It will automatically create a new project with a generic
name. The initial screens are very intuitive and don't require a lot of in depth discussion.
On the first screen, it says that there are 41 screens to go through, however it is unlikely you will ever have to go through everyone. EQUEST will dynamically change as you go through the screens. For example, if you select day lighting controls it will open new pages to fill out. Any changes made will also enable existing fields.
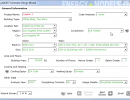 Screen 1: The first screen is probably the most important. This is where we set up the location, region and city, which in turn will determine the weather settings. EQUEST will automatically download weather information for you from DOE2.com. You can also select the jurisdiction (i.e. CA Title 24), rule sets that will help determine other defaults. We can also specify the code analysis as title 24.
There are a number of utilities for selection, later we will discuss creating a custom utility. You also define a few characteristics of the building such as number of floors below and above grade, cooling equipment and heating equipment. These will set up later pages with hopefully correct defaults.
Note of interest: The number of floor is limited to 3 floors in the SD wizard. If you have 100 floors it will model the middle floor 98 times.
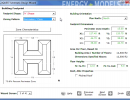 Screen 3: The next screen ends up being screen 3 since eQUEST skipped page 2 due to certain variables selected on the first page. On screen 3 we select the footprint shape, and zoning pattern. Of course there are only common patterns available, we'll discuss custom shapes in a later lesson. You can also change orientation and dimension.
Screen 4: General construction parameters. EQUEST doesn’t leave much room for custom materials since SD wizard is for less complicated buildings.
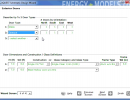
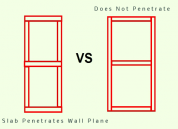 Screen 5: Define floor slab effect, ceilings, vertical walls and floors. The floors section contains a checkbox for “Slab Penetrates Wall Plane”. See the diagram.
 Screen 6: Define door types. Notice that multiple door types are available and Doors by Orientation will auto-complete to one in each direction. You can have multiple door types and multiple doors in each direction of each type, but its important to note that all doors will be placed on the ground floor.
 Screen 7: Here you define the glass types of the building. It also important to adjust the frame width depending on the data that you brought in.
Note the option to import data from Window 4/5, a window calculation program.
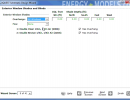 Screen 8: EQUEST allows you to model a number of different types of overhangs and fins. When we select an option more fields become available.
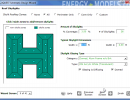 Screen 9: Now, we start to see some of the really interesting features of eQUEST. For example, if we add skylights, instantly a number of fields that are illustrated become available. In the video we stick with the defaults, but we could change the amount of skylights to 5%, and then the image changes in relation to the percent coverage.
If you need to restore defaults, just right click and select "Restore Default" Defaults appear in green, changed values red.
At this point we have the exteriors of out building defined, the next step is to define the interior operation, since all materials have been determined at this point.
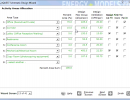 Screen 13: Here we determine the percent area of a certain type, the design occupancy and the design ventilation.
The Design Ventilation is based on ASHRAE Standard 62.
In the example we leave the defaults since it is for a simple building. Screen 14: Since we have defined the area types, we now have to define what goes on in those areas, such as: lighting, task lighting and plug loads. We also have to do this for unoccupied times of the day. By default the SD wizard give us two types of occupancy, occupied and unoccupied.
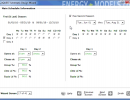 Screen 17: As we continue we can define the main schedule for the first season. We can also enable a second season, for instance when modeling a school. In fact the default second season, defaults to the summer schedule. In the video we just use one schedule.
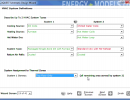 Screen 19: Here we describe the HVAC system types. However, this does not mean that we're only going to have two systems. For example, we have DX Coils and Electric Resistance heating. We're essentially having single zone systems for both our system types. So in reality, we're getting one system per zone. If we change the systme to chilled water coils, left the heating as hot water coils and we changed it to standard VAV instead of having one system per zone, we'll have one system per floor. At the bottom of this screen, whenever you have two sytem types, it allows yuy to tell what portion of the building that system 1 serves. The desing devleopment wizard has more options. All remaing floors or zones will be served by system two.
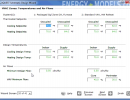 Sreen 20: As we continue in the next screen we can define our set points, which is pretty straight forward. We can also define our minimum design flow and our VAV minimum flow.
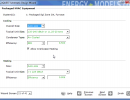 Screen 21: Now we define the EER and other factors of our package single zone system. Please note, as we said before, this is a single zone system, and in fact there's multiple units, so all units are going to get the same efficiency. We can do more than this in the detailed interface, but the SD wizard is limited for simplicities sake. The same is said for heating.
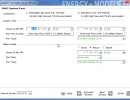 Screen 24: Here we define our fans. We can define our static, the efficiency level. Please note that selecting high efficiency complies with standards such as Title 24 and ASHRAE 90.1.
 Screen 25: Time to define our fan schedule. Here we can define if the fan starts and hour before or two hours before, and runs an hour after or some other hours after. Or we could shut down the fans early and put negative one.
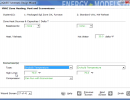 Screen 27: We also do the same for our second system. Here we can define our zone heat sources, for instance if we had base board heating on both systems. Probably more common is to define an economizer. There are several types available for either system, such as high limit shut of and whether or not the compressor can run with the economizer.
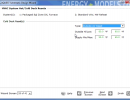 Screen 28: For applicable systems, you have the option to run outside air reset. This is it's own topic, but its fairly straight forward.
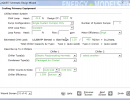 Screen 31: Only available when you are using a chiller or some sort hydronic system. We can define the pumps, head and flow, which will be used to determine the pump power. Please note that the eQUEST wizards only allow us to define the primary loop, and not a secondary loop. We can have up to two chiller types, though we can have multiple chillers of each type.
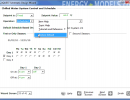 Screen 33: Define control points and chiller operation. Select scheduled and scheduler will appear.
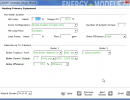 Screen 34: We define the same thing for heating hydronic system. Again, we can have two boiler types and multiple boilers of each type. We define the hydronic control set point and the operation.
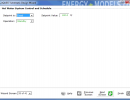 Screen 35: Hot Water System and Schedule, define the hydronic control setpoint and operation.
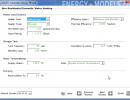 Screen 36: We're near the end! Now we start to define non-residential domestic hot water heating. In other words we've gotten past the HVAC portions and have moved onto things that do not affect the load, but consume energy. Here there are multiple f ields that are pretty straight forward, at the bottom the recirculation percent of the pumping is available. If we leave this at 0% it assumes that local water pressure will suffice to meet the peak demands.
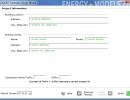 Screen 41: Finally the last screen. This displays t he project information. It's not necessary to fill anything out, I would recommend filing out these p arameters just for sanity's sake. When you work on multiple projects, the importance of this will become evident. Now click finish!
Once we click finish its going to load the BVL file, once complete we'll be able to see our building laid out. We can look at our building with it's 3D geometry. 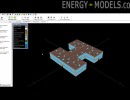
If you hold the control key and click the mouse you can move the building in any direction.
There a number of other features that we'll cover in future lessons.

