Weather File Missing Error eQUEST
(You'd already know this if you went through our eQUEST online training program!)
Typically, default eQUEST locations install automatically, but lately, they do not, which causes an error.
The error states: The following weather file is required to perform the simulation for the selected location but was not found.
We will present multiple solutions, but first, let's note that the error looks like this:
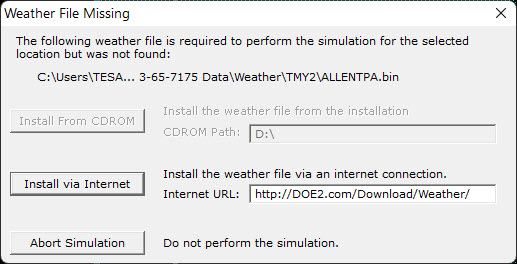
The "install via internet" button will not work, but you can try it.
Solution Number 1: Download the weather file from the source
The easiest solution is to quickly download the file yourself and place it in the proper directory.
Step 1: Note the File type and the file name:
Here we see that the file type is TMY2, and the name is ALLENTPA.bin
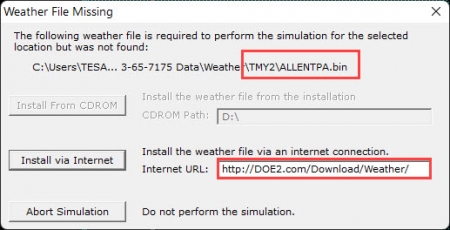
Step 2: From the image above, note the default directory
From the error message, next to the file name and TMY2, we can see that the default directory for this file is in the "...3-65-7175 Data" folder, then the TMY2 folder.
Step 3: Download the file from the source
So, to keep it simple, we simply need to place the weather file to TMY2 folder. The "Install from Internet" shows us the source of weather files. Copy http://DOE2.com/Download/Weather and paste it into your browser, and that will bring up a page that looks like this.
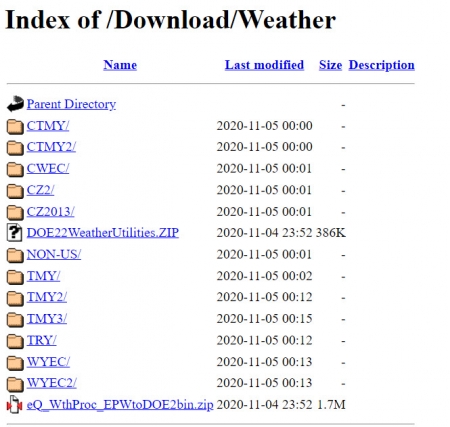
We already noted that we are looking at a TMY2 file, so we can click that folder.
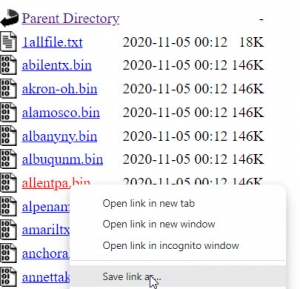
In this case, all of the files are in one folder and sorted alphabetically. Scroll or do a Ctrl+F
Find the file, then Right-click the file and click "save as"
For most users, the eQUEST weather folder is in your documents folder. Locate your documents folder and then open the folder you noted in step 1. In this example, we note that it was located in folder ending in "3-65-7175 Data".
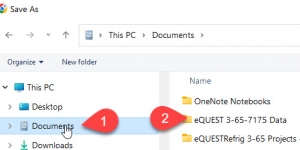
When you find "eQUEST 3-65-7175 Data", open it and located a folder called "Weather".
From the weather folder, open the folder we noted in step 1, which as "TMY2" in this example. You can see that I already have a number of weather files in my TMY2 folder. Your folder may or may not have any existing files in it. That does not matter.
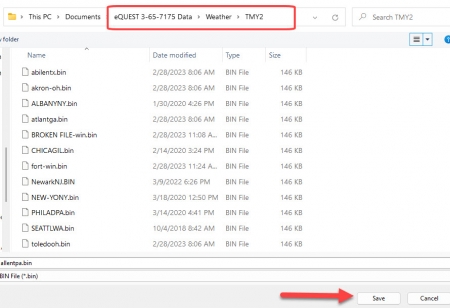
You can then click save, to store the bin file in your TMY2 folder.
If everything was done correctly, your file will simulate without the "Weather file missing Error"
Solution number 2 is to avoid the "install" and use a custom weather file:
Step 1: Download the weather file. It has to be in .Bin format. eQUEST will not recognize a weather file in .epw or .TM3 etc.
Download an eQUEST weather file from any source. You can use http://DOE2.com/Download/Weather, but if you want to use a more accurate location, or a newer source of weather, you can do that too!
eQUEST course subscribers or community members on energy-models.com have access to thousands of extra .bin weather files for eQUEST? The benefit is that these files are more modern and thus account for climate change. Many of the weather files from DOE2 are sourced from the '70s. The bin files you can find here are mostly sourced from 2004-2018, which is as modern as you can get.
You can search for weather files here
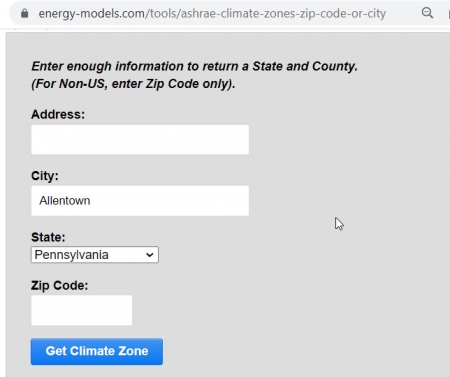
In this example, we can search for the location.
Then scroll down and find a location on the map.
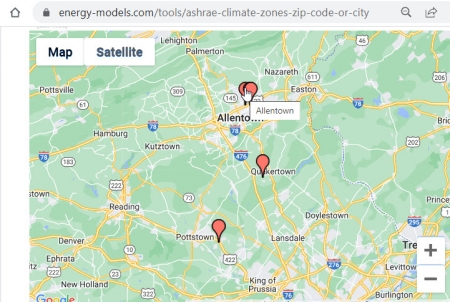
Then click and download the zip file. You will have to extract it and then move the .bin file
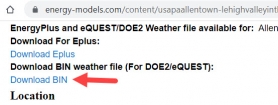
Step 2: Save the weather file wherever you want, but we recommend the weather folder for eQUEST because it makes everything easier later
We will place it in the weather folder.
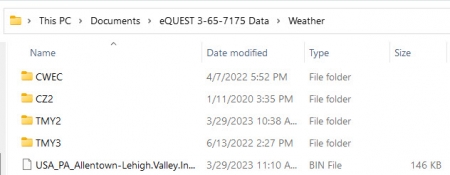
Step 3: When setting the weather in eQUEST wizard screen 1, select "Custom"
Click the "..." button and select your weather file.
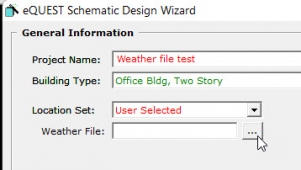
From there, your model will not receive a weather file missing error or need to download weather from the internet.
OPTIONAL Step 4: If you are already in detailed mode
Go to the Project and Site Module and right click the project and select "Properties"

Assuming you saved your weather file to the weather folder, you can simply copy/paste the weather file name.
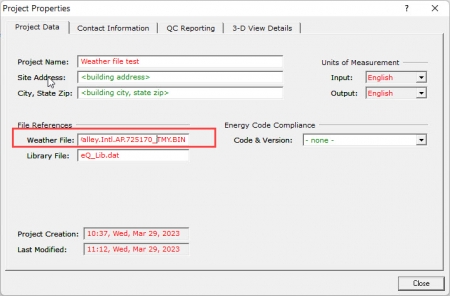
When you click OK, eQUEST will prompt you to edit the Site properties. You will want to click yes, and the primary input you want to correct is the Altitude (which doesn't have to be perfect, but it will make an impact if the weather file is high altitude)
It's easier to enter this information in the wizards. However, if you are using Detailed mode, you can probably sort this part out.
If you want to learn eQUEST in a similar straightforward style, check out our eQUEST training program and learn how to bypass all of these time-consuming and frustrating errors!